Estimated reading time: 3 minute(s)

(continued from yesterday’s post)
We had heard that some people do just fine by stitching two sheets together with waterproof tape. I did a bit more research online and found waterproofing repair tape was indeed a real product, and might actually work.
And it might have, had the weather cooperated. And, had the second piece of plastic been at least close to the quality of the first.
Once we had pieced our liner together, we placed the seam and the poorer-quality plastic at the top of the grade, where the least water would be on it. (Unfortunately for us, this meant that it would also take way too long to get ANY water on it, to hold it down.)
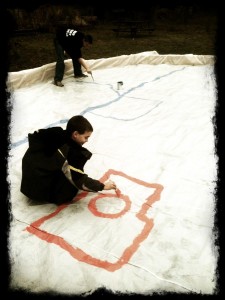
 Before the water, though, we had to paint!
The boys had the fun idea of painting all the hockey lines on their rink. They even had a name (and logo) for their rink! This was probably the most fun part of the entire project! Sadly, the day we were installing the liner and painting, was a very rainy, wet day. So, not much of their art was left the next morning when we began the “Big Fill”.
And I do mean B-I-G.
Forty-five minutes into the “Big Fill”, I went to check on the progress, and it looked like a heavy rain had collected on our liner. Just a small puddle in the deepest end. Wow! Guess I’ll give it a lot more time!
Four hours later… only about a third of the rink had water in it! Deepest part was at most four inches deep. Holy smokes!
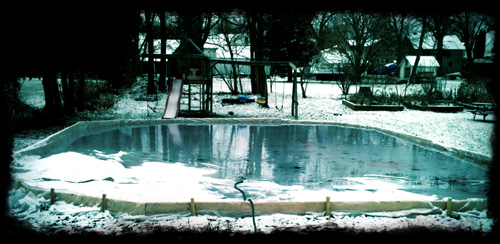
Twenty-four hours later of almost constant water flow (we had to stop it a few times because it was reducing water pressure to other things in our house like dish washer, washing machine and toilet!) it was about 10″ deep at the deepest spot, and about three quarters of the rink was covered. Nice! But really? Still not done???
I must back up one more time and explain what I think is the biggest reason.
The day we were doing the Big Fill, was also a very windy day. VERY windy. Like sustained 30 mph winds.
You’ve gotta be kidding me!
The plastic had already been blown off a few times, so I secured it to the frame with staples. All seemed good except wind can get into very tiny places. (And thin, flimsy plastic—like the Plan B plastic we used—likes to blow around!)
Unfortunately, the slow-rising water, and the high-velocity winds (and the poor-quality plastic) were a major setback for our rink. The wind kept whipping the plastic around, so much so that it tore apart the seem we had created with the waterproof tape. (Guess it’s not windproof.) Now there are very obvious holes in a couple spots in the seem, and being slightly submerged, we can no longer apply the tape (it needs a dry surface).
Our last attempt to make this work is to let the very cold air tonight and tomorrow freeze what’s in there (including some over part of the seem) and perhaps let the ice be enough of a seal as we add more water, little by little? The problem with this plan is that the ice will very likely melt in the next week or so (at least a little) … so, will our crazy ice-seam be enough to hold?
No idea. But we are going to be experts on this by next year! 🙂
- Get accurate measurements: angles, board lengths, full rink dimensions
- Get one, high-quality sheet of plastic liner!!! (Even MORE than you think you’ll need!)
- Only apply paint on dry, warmer days…
- Allow about THREE DAYS to fill the rink!!! Preferably NOT windy days!
I’m thinking the lessons are not done just yet … but that’s what we’ve learned so far. I’m pretty sure we’ll get to skate on this rink, even if it hasn’t worked out entirely as planned. And without a doubt, it has been a super fun family project the whole time. Unexpected turns of events and all!

[…] to be continued tomorrow! Related […]
[…] good news is, the kids are still having a blast with it, and what I wrote in Part 2 of this saga will still greatly improve next year’s rink, if we do get to do that. For now, […]
[…] you know if you read parts 1, 2, and 3 of this story, we’ve had our share of difficulties besides the lack of freezing […]